Tuesday, July 17, 2007

My Work :: Part 24: AngstyBishy Kenshin

A huge burden has been lifted off me: I finally got Kenshin done!!!!!! It has taken forever, but he finally made it to the finish line in the end.

Not that MAKING him was a burden; he was tricksy but fine. No, the problem was the burden I put on myself for not getting him completed in a timely fashion. The cloud hanging over me of "oh, I am taking forever" and "it's been too long; will he look as good as the others?" and "I am so evil for taking so long" and other mindgames I play with myself. Ha, now *I* am angsting; enough of this.

Getting on the to REAL reason for this post; ever since Jess got me hooked on Kenshin I just knew he had to become an AB. She always said he would make a good AB, way before I knew the character well enough to agree with her, but of course she ended up being right. I mean, he has monstrous sins he feels he cannot atone for; his romantic past has scarred his current romantic relationship; he is always at risk of slipping into Battosai mode; and the list goes on. He is not as wangsty and self-pitying as some, but he most definitely qualifies.

If you look at the original sketch and the completed vector, you will see a LOT of differences. His hair reminded me a little too much of some guy in an 80's hair band, beeing so big and shaggy, so I flattened it a little. But a lot of his pics show him with hair like that; what's a girl to do? And then there was the tragedy of the hakuma; it looks decent in the sketch but kept loking like a white pleated dress in Illustrator, no matter what I did. Elicia helped me make it look more like manly hakuma pleats, thanks goodness, and while I keep feeling there is something more I can do, I'm content for now. Then Melissa noted, to my eternal shame, that I had completely forgotten to put the scars on his face! *headdesk* Of all the things to forget; I'm so glad she noticed in time! So all of these challenges, along with the fact that I had freelancing and other woes to tie up much of my spare time. Meh. So in short, I think he turned out darling, but I'm afraid every time I look at him, I will feel procrastination shame. We'll see how long that lasts. I can't wait to make him a pillow; you get the first one Jess! =)

Oh, and I'm working on a new AB; another classic anime character, before i take deep breaths and start attempting daunting AB's like Cloud. I go the reference pics last night, as a breather from my projects, and hope to sketch him tomorrow; maybe tonight if I can't fall asleep.

Labels: , ,

Wednesday, June 13, 2007

Freelance Foibles :: Part 2: Photoshopping of DOOOM

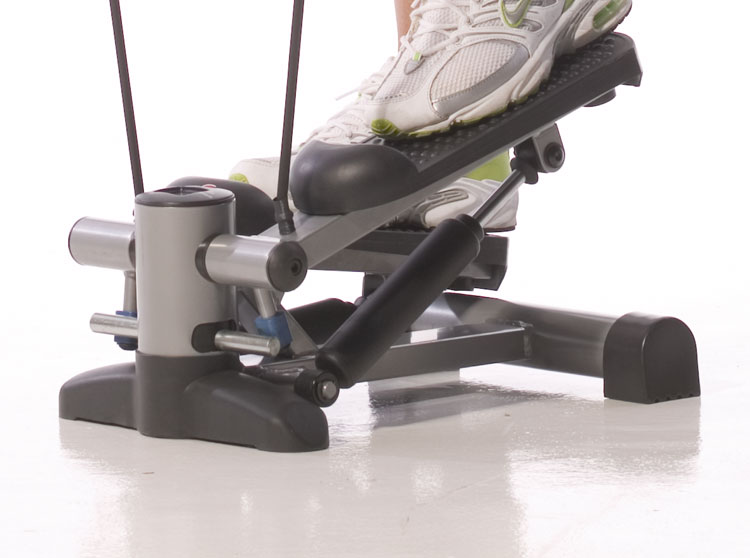
So my last big freelance project required me to do mondo Photoshop work of death, torturing both my soul and my sleep cycle. (Especially since I had to do it twice, once in a low res and then in a high res format. Meh. My photoshop tweaking is rusty, as our office's Photographer usually handles those things, and Illustrator has been my stronger program since college. Anyway, I'm begrudgingly surprised at how well it turned out, as it could have been a disaster, so I decided to throw up a before and after pic, and give a short explanation of how I did it for my own memory banks.

Here is the before pic.


In short, the project required me to became BFF with the clone tool. I also did a lot of burning, dodging, erasing, free transforming, selecting, cutting/pasting/moving other images into the file, changed levels, and had to replace color from grey to white.

Below is the result.


Basically I started off by selecting a black foot wheel from another image file (unusable for a box design but good reference photos) and moved that into the file. I used the clone tool to give the main front cylinder a longer shape and cover over the plastic feet. I used the little cylinders parallell to the floor to create the new front cylinder that the feet rest on, burning and dodging it so it would blend in to the other cylinder part. I then erased the part of the cylinder that overlaps the front cylinder so it looked like the two parts were connected, burning and didging some more. I copied the black back foot twice to give the front cylinder its two feet, erasing parts as necessary. I then worked on the back and underside, moving pieces to different angles, creating completely new pieces and blending them into the existing stepper. My biggest regret is that my skills were not good enough to save the floor; it got so wonky looking that I had to erase it. After all the major work was done on the stepper, I used the replace color option and made the grey whiter. Ta Da! (Ta Meh really, because like I said my Photoshop skills are rusty; hence even though the second time doing it was faster, it still took me over 10 hours to do. Grrr.)

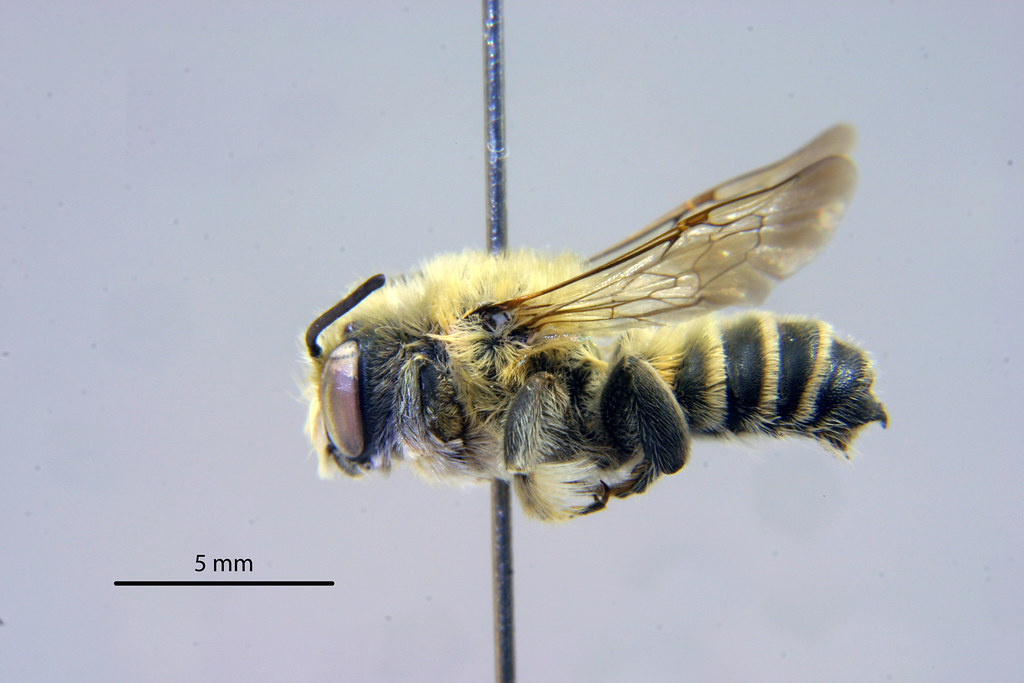
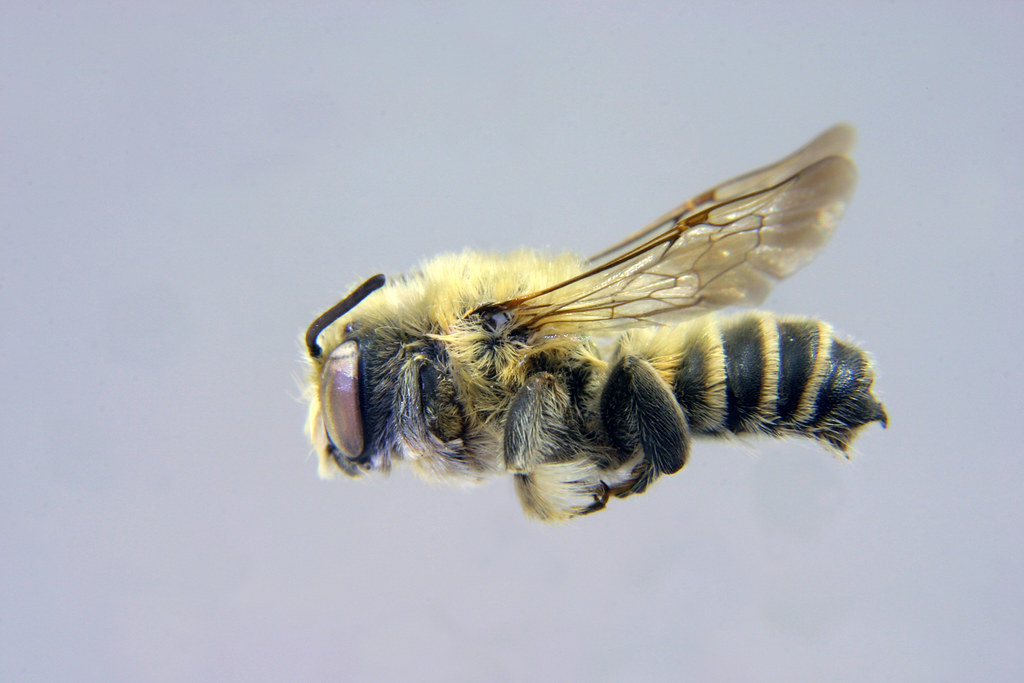
On the plus side, I get paid for all that time (man, are they going to hate my invoice!), plus it made other Photoshop projects I was doing at work a breeze. Below is one example; we are making a bee poster, and I needed to remove the pins sticking through 30+ bees. While the ones I did before this project seemed harder, the ones after undertaking the mini stepper seemed like a breeze in comparison. Each one took only about 5-10 minutes to do, and most of that was spent cleaning up the spots in the background. I have a smaple of one below.

Before I Photoshopped:


After I Photoshopped:


Again, just simple uses of the clone tool. I used the healing brush a little as well, to really smooth out and blend some parts of the backgrounds, but it was mostly a clone tool job.

Everything worked out for the best, I suppose, but I'll keep a mental note to think twice for this company when Photoshopping is involved. Or at least try really hard to convince them to schedule a new photo shoot of the product.

That's all for now! I have to get pet products finished tonight as best I can. (Whimper.) My bed so misses me; we will have to totally get reaquainted when this is all over (meaning when I can finally take a day off and just SLEEP. ALL. DAY.)

Labels: , ,